Centre pivot
Rotates on its middle. Cheapest, easiest to clean, and the sash intrudes into the room when open.
A window trimmed into a pitched slope between the rafters, weathered by a flashing kit chosen for your exact roof covering.
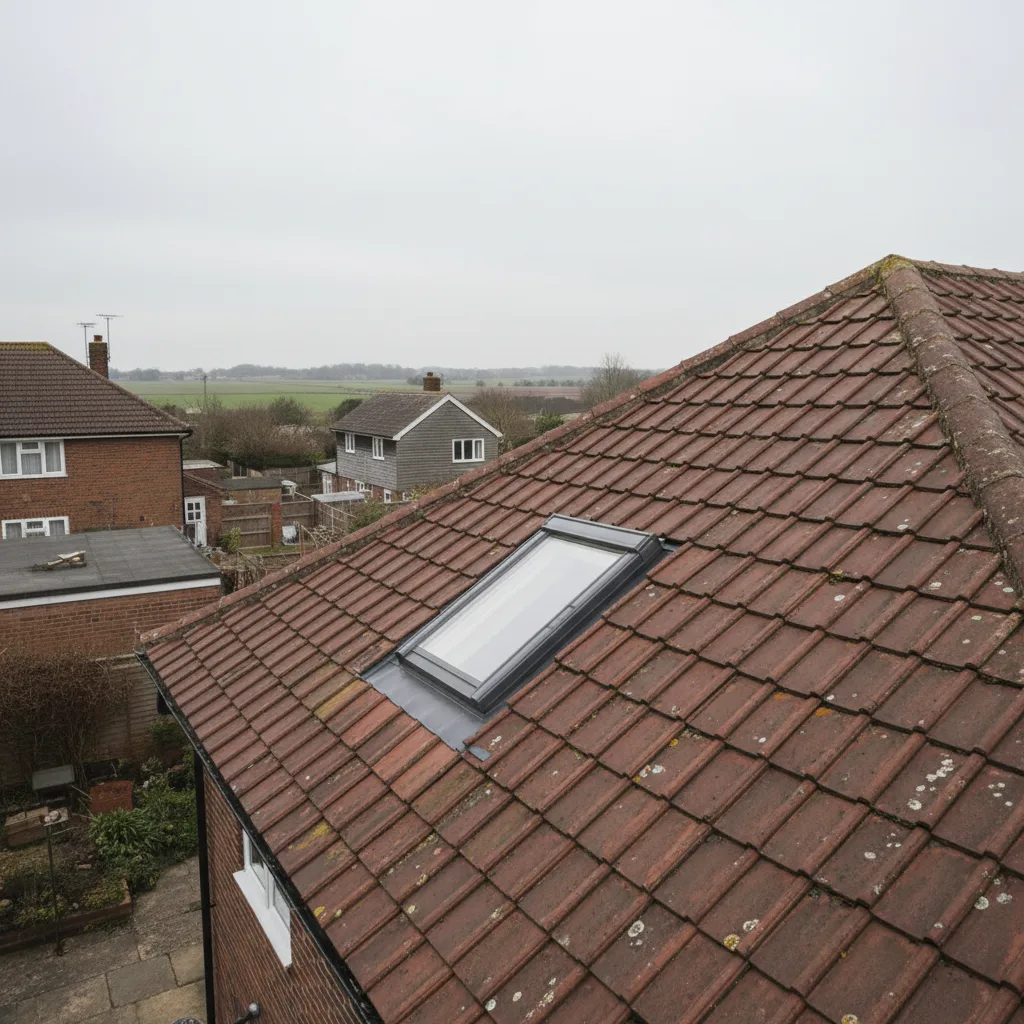
Not when it is trimmed properly. Rafters either side are doubled and trimmers go in above and below. On a trussed roof nothing is cut at all, which caps the width instead.
Not if the kit matches the covering. A plain clay tile, a deep profile concrete tile and a slate each take a different kit, and using the nearest one in the van is how a slow leak starts.
Fifteen degrees is the usual minimum. Some units are rated from ten with a specific underlay detail. Below that the manufacturer will not stand behind the weathering.
On a cut roof usually yes. On a trussed roof the clear width is capped near 550mm unless an engineer designs a trimming solution, and two narrower units often light the room more evenly anyway.
The unit is the small half of the job. What varies from installation to installation is the couple of hundred millimetres of roof around it, and none of it is visible once the work is finished.
Rotates on its middle. Cheapest, easiest to clean, and the sash intrudes into the room when open.
Opens outward from the top, leaving the full opening clear. Better where the window is at head height.
Sized and swung to meet Part B where a loft room needs a means of escape.
Evenly spaced on one slope, with the flashing detailed between them.
Put in the room and the roof. This applies the same rules a survey starts from: glazing area against floor area, then the glass specified for the way the roof faces.
| Floor area | Glazing at 15% | Glazing at 20% |
|---|---|---|
| 12 m² | 1.8 m² | 2.4 m² |
| 16 m² | 2.4 m² | 3.2 m² |
| 20 m² | 3.0 m² | 4.0 m² |
| 25 m² | 3.8 m² | 5.0 m² |
| 30 m² | 4.5 m² | 6.0 m² |
The ratio moves up for a deep room with one external wall, and down for a small south facing room where the same area would overheat it. Orientation decides the glass: north takes neutral glazing, south and west want solar control.
We look at the roof, the covering and the slope before we say anything about price.
The right unit and glazing for that roof and that orientation, in plain terms.
Written, itemised and firm. The number does not move once work starts.
Opening formed, unit set and weathered, covering made good. Notification is ours.
A roof window is the unit that goes into a slope. It is trimmed between rafters, it sits within the plane of the tiles or slates rather than on top of them, and it is weathered by a flashing kit chosen to match whatever the roof is covered in. That last sentence is doing most of the work on this page, because the covering and the structure underneath decide the size, the position and the price long before anybody opens a brochure.
This is the long version for pitched roofs across Chelmsford and the thirty miles of Essex around it. It covers what the slope will allow, how the opening is formed, the detail that keeps the head of the window dry, the regulations a window in a roof engages, and what actually happens on the day. If the roof you have in mind is flat, the answers are different and they live on the flat roof rooflight page. Everything here is part of the wider rooflight and skylight service.
Of all the ways to get daylight through a roof, this is the one with the longest history and the most standardised parts. A roof window is a factory made unit in a timber or composite frame, supplied with a flashing kit, sized to a published grid, and designed to be fitted by two people in a day.
That standardisation is why it is usually the cheapest daylight per square metre available on a house. A roof lantern is a made-to-order structure. A walk-on unit is engineered glass. A roof window is a product with a part number, and the skill is entirely in the hole it goes into and the way the covering is dressed back around it.
Every roof window carries a permitted pitch range, and it is not advisory. The common range is fifteen to ninety degrees. Several units are rated from ten degrees, but only with a specific underlay and flashing arrangement, and usually only in the flat interlocking tile or slate versions.
Below the stated minimum the physics turns against you. Water leaves the glass slowly, wind driven rain gets under the apron more easily, and snow sits rather than sliding. On a genuine ten degree slope, which turns up on interwar rear additions and on some sixties bungalow extensions around Canvey and Rayleigh, the honest answer is often a kerb mounted flat unit rather than a roof window forced past its rating.
The width of a roof window is set by the timber, not by preference. In a traditional cut roof the rafters run from eaves to ridge at a regular spacing, and a window is sized so that its structural opening lands with one rafter removed and the two either side doubled, or with no rafter removed at all.
So the question at survey is simple. What is the spacing, what is the section depth of the rafter, and is there anything crossing the space that has to move. Purlins, collars, a hip rafter or a valley all restrict where an opening can go, and a purlin at the wrong height is the single most common reason a window moves half a metre from where it was first drawn.
The spacings you meet are fairly predictable by age, and they narrow the choice quickly.
| House type | Typical rafter spacing | What that allows |
|---|---|---|
| Victorian terrace, Chelmsford and Colchester | Irregular, often 350 to 450mm | Narrow units, or one rafter trimmed |
| Interwar semi, commuter towns | 400 to 450mm | Most standard widths with one rafter cut |
| Post war cut roof | 450 to 600mm | Wide units, straightforward trimming |
| Trussed estate housing | 600mm, engineered | Units sized to fit between the trusses |
Victorian roofs are the awkward ones. The rafters were often set out by eye, sections are lighter than a modern designer would use, and it is common to find spacings varying by fifty millimetres across a single slope. Nothing about that stops the work, but it does mean the opening is set out on site from actual measurements rather than off a drawing.
On the estates at Great Notley, South Woodham Ferrers, Beaulieu Park and across the Harlow and Basildon new town stock, the roof is trussed. The webs and the bottom chord are structural in tension and compression, and the sensible route is to place the window in the clear space between two trusses.
At six hundred millimetre centres that leaves a structural opening of roughly five hundred and fifty millimetres once the trimming timbers are in. There are standard window widths at that dimension from every manufacturer, precisely because the situation is so common. Where more glass is wanted, two windows in adjacent bays, separated by a single truss, gives a good result and reads deliberately from the garden. Cutting a truss is possible, but it becomes a designed alteration with a structural engineer’s detail behind it, and that changes the shape of the job.
The carpentry is well established. The rafter through the opening is cut back, trimmers are fixed horizontally at head and sill to carry the cut ends, and the rafters immediately either side are doubled up to take the redistributed load. Everything is in the same timber section as the existing roof, joined with structural screws or bolts rather than nails alone.
The one number that matters throughout is the structural opening size, which is the clear dimension between the finished trimmers. Every manufacturer publishes it, it is normally the frame size plus a small tolerance on width and height, and cutting it undersize means planing timber in a loft, while cutting it oversize means packing the frame and losing the fit of the flashing. It is measured twice.
Position in the slope is a design decision with a rule of thumb behind it. The bottom of the window wants to be low enough to see out of when seated, which on a typical loft pitch means the sill sits around nine hundred millimetres to a metre above the finished floor. The top wants to be high enough that light reaches the back of the room, and roughly two metres above floor level is the usual target.
Those two figures pull the window taller rather than shifting it. On a steep Victorian slope of fifty degrees a shorter unit does both jobs. On a shallower thirty degree roof the same view and the same reach need considerably more height, which is why loft conversions on interwar semis so often end up with long windows rather than square ones.
Where one window will not deliver enough light, a pair usually beats a single wide unit. The light lands in two places rather than one, the structural work stays modest, and the roof keeps a rafter or a truss in the middle doing its job.
The spacing between them is set by the flashing. Standard kits need a minimum clear distance between frames, commonly around one hundred millimetres, so that each apron and each side flashing has room to be dressed properly into the covering. Combination kits exist that close the gap to as little as eighteen or one hundred millimetres depending on the system, and they turn two units into what reads as one composition. The narrower the gap, the more the flashing has to be planned before the covering comes off.
This is the detail that separates a lasting installation from one that gives trouble in the fourth winter, and it is invisible once the tiles go back. Water running down the slope has to get past the window, and it does that by being carried around it, not over it.
The underlay is cut and dressed to form a gutter above the head of the frame, taking water sideways to either side of the opening, where it rejoins the drainage plane below the tiles and continues to the eaves. On a modern breathable underlay the drape between rafters does part of this naturally, but at an opening it is formed deliberately, supported on a batten or a proprietary drainage channel supplied with the window. Where an old bitumen felt has gone brittle, it is cut back to sound material and the new underlay is lapped over it in the direction of flow, never under.
Laps are directional and the rule never changes: upper layers over lower layers, so water travels on top of the membrane all the way down. It sounds obvious in a sentence and it is the single easiest thing to get wrong in an awkward corner around a window head where three pieces meet.
The minimum head lap depends on pitch. Shallower roofs want more, because water runs slower and wind gets further under. On roofs under about twenty degrees a hundred and fifty millimetre lap is a sensible floor and many specifications ask for more. Around the window, the side pieces are lapped over the gutter piece, and the gutter piece is lapped over the underlay below the sill. Get that order right and the membrane alone would keep the loft dry with no tiles on the roof at all.
Two ways of setting a roof window into a slope are in common use, and they look quite different from the garden.
A standard flashing sits the frame so that the glass line stands slightly proud of the covering. It is quick, it is robust, and on a deeply profiled concrete tile it is the only sensible option, because the apron has to bridge a considerable depth. A recessed flashing drops the frame lower into the roof structure, so that the glass sits close to flush with the surrounding tiles or slates. It reads much quieter from outside, it holds a little less bulk against the sky, and it costs more in both the kit and the labour.
On a plain clay tile or a natural slate, recessed is usually worth the difference. On a bold profile pantile the recess gains little, because the covering itself has depth and the eye reads the profile rather than the frame.
Natural slate is thin, flat and unforgiving of an approximate flashing. The kit for slate has a low profile apron and side pieces designed to sit tight to a surface with no trough to bridge.
The work either side of the window is the part that takes time. Slates are cut to width on the verge of the opening, holed rather than nailed through the tail, and often secured with a copper or stainless disc rivet where a cut piece is too narrow to hold two nails. On a Welsh slate roof over a Victorian house in central Chelmsford or Maldon, that detailing is what makes the finished job look as though the window has always been there. Rushing it produces a line of cut slates that catch the eye from the pavement for the next thirty years.
Plain clay tiles are small, double lapped and laid in a broken bond, which makes them the friendliest covering to work into. The kit uses soakers dressed between the courses, and cut tiles either side of the opening are bedded and clipped. The result is close to invisible.
Profiled concrete tiles, the default on everything built across Essex from the fifties onwards, are a different problem. The apron has to be dressed down into the troughs of the profile, and that only works with a kit made for the depth of that specific tile family. A kit for a low profile tile fitted to a deep pantile leaves an unsupported bridge over each trough, which lifts in wind and lets rain drive under. The kit is ordered by profile depth, not by whatever is nearest in the van.
Once the frame is in and the flashing is dressed, two layers close the perimeter from the inside and both of them matter more than their cost suggests.
The insulation collar is a mineral wool or foam sleeve that wraps the outside face of the frame and fills the gap to the trimmed timbers. It stops the frame becoming a cold ring in a warm ceiling, which is what produces a line of black mould on the plaster of a badly fitted window. Inside that, a vapour control apron is taped from the frame onto the ceiling membrane, so warm moist air from the room cannot pass into the insulation zone and condense on the cold side. On a converted loft with a warm roof build-up, the tape line around the four sides of the window is the continuation of the airtight layer, and it is checked before the plasterboard goes on because after that it is unreachable.
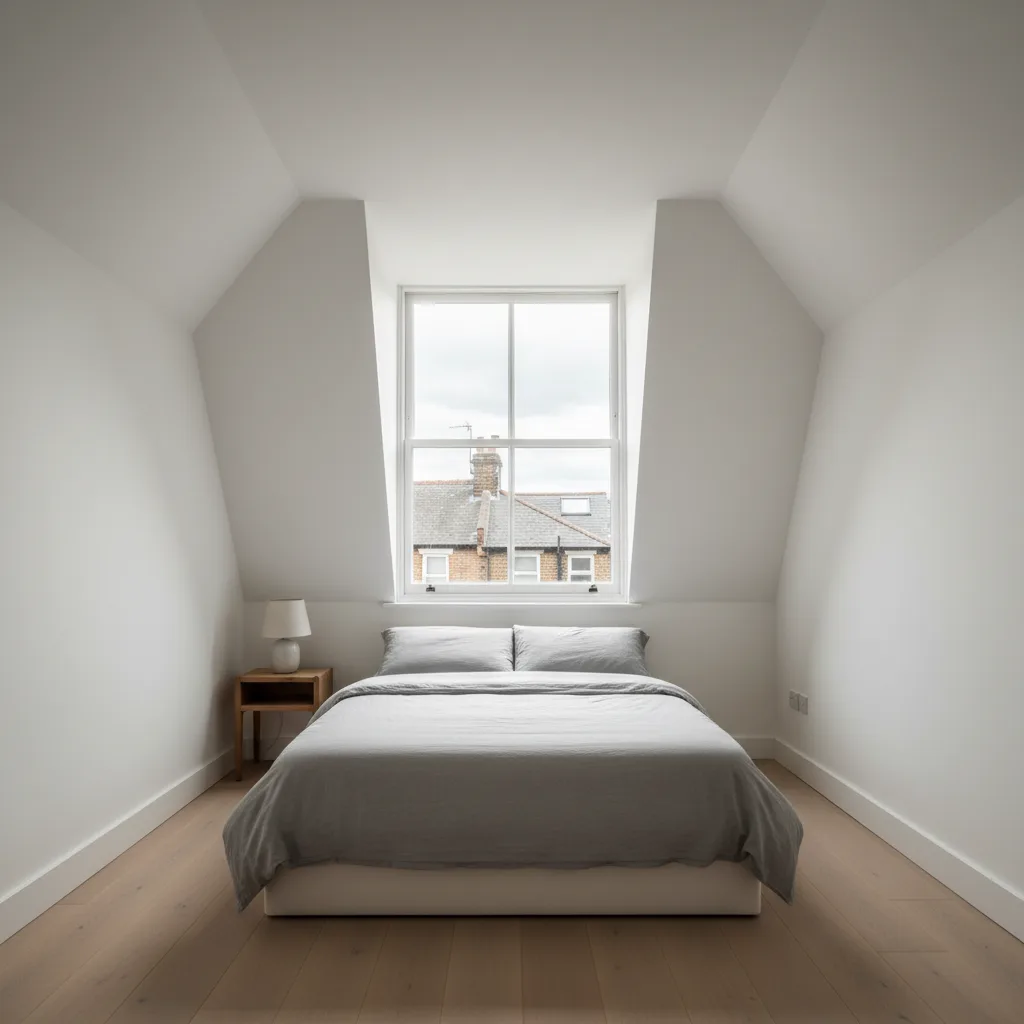
There is a convention for how the internal lining is formed and it is based on physics rather than taste. The head of the reveal is splayed, opening out into the room so that light spreads across the ceiling instead of falling in a hard rectangle. The sill is returned vertically, straight down to the floor plane, so that warm air from a radiator beneath rises up the face of the glass.
That vertical sill is doing real work. It sets up a convection current over the inner pane, which keeps the glass warmer and dramatically reduces surface condensation in winter. A boxed or shelved sill traps the air below, and the result is a window that runs with water on cold mornings while an identical unit two houses down stays clear. The splay at the head and the vertical at the sill together are worth more than an upgrade in glazing.
Centre pivot units rotate about a horizontal axis roughly halfway up the frame. The handle is at the top, which means the window can be operated from behind a fixed piece of furniture, and the sash rotates fully for cleaning from inside. It is the right choice where the window is high in the slope, or above a desk or a bed.
Top hung units hinge at the head and swing outwards, so the whole opening is clear and you can lean out. That suits a low set window in a room used as living space, or any window where the view matters. Many units do both, hinging at the top for normal use and switching to a pivot for cleaning. Where the reach is awkward, an electric opener answers it, and the cable is far cheaper to run before the plasterboard than after.
The mechanism also sets where the handle lives, and that is worth thinking through in a small room. A top hung unit puts the handle at the bottom of the sash, within reach of anyone standing at the sill, which is useful in a study and unhelpful in a child’s bedroom on a first floor slope. A centre pivot puts it at the head, out of casual reach. Both take a locking position that holds the sash slightly open for background ventilation without leaving the room open to anyone on the roof.
Any habitable room in a loft conversion, and any inner room where the escape route passes through another space, needs an escape window unless the property has a protected stair. The requirement is dimensional and it is checked.

The unobstructed opening must give at least 0.33 square metres of clear area, with neither the height nor the width less than four hundred and fifty millimetres, and the bottom of the opening must sit no more than eleven hundred millimetres above the floor. A centre pivot cannot meet it, because the sash itself blocks half the opening. An escape unit is top hung and swings clear beyond ninety degrees, which is why the escape version of a window is a distinct product with its own code. Getting this wrong is discovered at the completion inspection, and by then the covering is back on the roof.
Fitting a new roof window or replacing an existing one is notifiable work under Building Regulations in England, and Sunspire handles the notification as part of the job.
Part L sets the thermal standard for the unit, expressed as a maximum U-value for the whole window measured in the vertical plane. Part B covers escape, as above, and also surface spread of flame where the window is near a boundary. Part K applies where there is a risk of falling through, which is engaged if the sill is low and the drop outside is significant. Part F is engaged where the window is the ventilation provision for the room, and a background vent in the frame is often how that is satisfied. Part A is engaged the moment structure is altered, which is every trimmed opening.
The glass in a roof window works harder than the glass in a wall, because it faces more sky and takes rain at a steeper angle. Two specification points are worth settling at order.
The outer pane should be toughened, and on a south or west facing slope solar control glass is worth the difference, because a thirty degree roof plane facing south west collects the July afternoon sun almost square on. Laminated inner panes damp rain noise and hold together if broken, which is the sensible call over a bed or a stairwell. The thermal side of the choice runs deeper than one section allows, and it is covered properly on the energy efficient rooflights page.
A roof window in a bathroom or over a hob is doing two jobs at once, and the second one is drying the room out. Warm wet air rises, hits the coldest surface in the room, and the coldest surface in a pitched ceiling is almost always the glass.
The answers are practical. Specify a unit with a polyurethane or laminated finish rather than a bare timber one, because painted timber in a shower room will not last. Fit a background vent and use it. Keep the sill vertical so the convection current works. And run the extract fan to a terminal in the roof or the gable rather than into the void, because a fan discharging into a loft puts a litre of water a day into the insulation directly around your new frame. That last point turns up on survey more often than any other single fault.
Roof windows normally fall under permitted development, subject to the projection limit of one hundred and fifty millimetres beyond the plane of the slope and the rule that nothing may sit higher than the existing ridge. Article 4 directions remove those rights in many Essex conservation areas, and Thaxted, Coggeshall, Saffron Walden and the older cores of Maldon and Braintree all carry protected fabric in quantity.
Where the planning position requires a historically plausible window, the answer is a slim black cast frame with a central glazing bar, fitted flush into the slope. That is a distinct product family with its own detailing, and it has its own page on conservation rooflights. Establish the position before anything is ordered, because the two window types are not interchangeable at the last minute.
Where a roof window has reached the end of its working life, the opening it sits in is usually still good. Misting between the panes, a chalky brittle frame or daylight visible around the lining are the signs, and twenty to twenty five years is a normal span for a sealed unit.
A like for like unit into the same structural opening is often a single day, with the flashing kit renewed at the same time, because reusing an old apron on a new frame is a false economy. Where the size is changing, the trimmers move and it becomes carpentry again. The detail of what transfers and what does not is set out on the replacement page.
Work on a pitched roof is worked from outside as well as inside, and the access arrangement is a real line in the price rather than an afterthought.
A single storey rear slope reached off a garden may need nothing more than a properly footed ladder and roof ladders on the covering. A first floor front slope over a pavement in central Chelmsford needs a scaffold with an edge protection, a licence from the highway authority, and a programme that allows for both. A loft conversion window at second floor level over a narrow side return needs a tower or a scaffold with a lift. None of this is dramatic, but it is the difference between two figures on a quote, and it is settled at survey rather than discovered on the morning.
For a straightforward window in a pitched slope, one day is normal. Two windows, or a slate roof with fussy cutting, runs to two.

The order is consistent. Protect the room below and sheet the loft. Mark the opening from inside and confirm it against the timbers. Strip the covering back beyond the opening on all four sides and set the tiles aside for reuse. Trim the opening. Set and level the frame, checking the diagonals, because a frame out of square will not close cleanly for the next twenty years. Dress the underlay and form the head gutter. Fit the flashing and re-lay the covering, cutting in around the frame. Fit the insulation collar and the vapour apron from inside. Then line, plaster and make good. The covering goes back and the roof is watertight before anyone leaves, whatever the forecast is doing.
The external half of the survey is the covering, its condition, the pitch measured rather than estimated, and the access. The internal half happens in the roof space, and it is the half that changes prices.
It looks at the rafter section and spacing, the position of purlins and collars, whether the roof is cut or trussed, the type and condition of the underlay, the depth and type of insulation, the ceiling line and where the reveal will land, and whether anything is running through the void that has to move. Cables, a cold water tank, a soil vent pipe and a bathroom extract duct all live in lofts and all of them are cheaper to deal with when they are found before a price is agreed.
A comparable quote is specific. It names the manufacturer and the model code, the external frame size, the structural opening it needs, the glazing specification with its whole window U-value, the opening type, and the finish. It names the flashing kit by code, and whether it is standard or recessed, because that alone can move the price by a useful margin.
It then says who forms the opening, who makes good the plaster and decoration, what the access arrangement is, where the waste goes, and that the Building Control notification is included. Sunspire quotes in two stages, a range by email once the basics are known and a fixed written figure after the survey, and the second one is the one worth comparing.
If you already know which room and roughly what you want, two pictures and three numbers are usually enough for a sensible range without anyone visiting. A photograph of the roof slope from outside, taken far enough back to show the covering and the eaves. A photograph of the ceiling from inside the room. Then the approximate room size, the covering type if you know it, and which way the slope faces.
If you are earlier than that, start with the structure rather than the product. Put your head into the loft and look at what is holding the roof up, because the difference between a cut roof and a trussed one narrows the field faster than any showroom will. Costs across the different unit types are set out on the costs page, and the areas covered are listed under areas.
Costs, comparisons and the questions we are asked most.
Pick your town for the local detail: the housing stock, the roof coverings and anything about the place that changes what should be specified.
We start with the building, the covering and the slope. Then we tell you what will suit it, and what it will cost, as a fixed written number.
Fill in what you can. It opens WhatsApp with the message ready to send.